Fly camera
Watch the video or,
Follow the step by step instructions below.
We will continue with your snowball animation.
Viewport shading
Enable the Rendered mode in Viewport Shading in the upper-right corner.
The camera
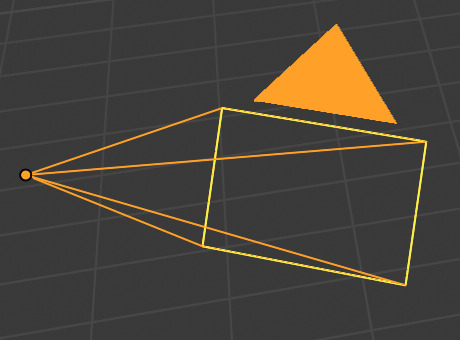
In your scene you have a camera. It looks like this:
You can select the camera by left (or right) clicking on it. If you want to see what the camera sees you can click on the camera icon on the right. This is the Camera view.
Or you can use the shortcut:
Numpad 0.
You can also play the animation and see what the camera sees:
Move the Timeline from frame 1 to frame 60. Do you see the snowball hitting the snowman’s head?
It might be that you cannot see the snowball hitting the snowman’s head through the camera. If you want the camera to have a clear view of your scene or to have a clear view of the snowball hitting the snowman you will need to move the camera. There are several ways to move the camera.
Moving the camera
You can select the camera and use the Move tool to move the camera.
Get out of the camera view by click again on the camera icon on the right. Or press the mouse wheel and move it round.
Select the camera.
Select the Move tool.

Using the Move tool you can move the camera in X, Y or Z direction.
Select the camera view and watch if your scene looks proper in the camera view.
If not, repeat the above steps.
Fly camera
You can also make the camera fly around your scene.
Select camera view.

Press SHIFT + grave accent. It is next to the number 1 key.
And move the mouse untill your scene is properly in the camera view.
You can also use keys like W A S D to move the camera. Which keys to use, you can find all the way at the bottom of your Blender screen.

Move the Timeline and check if your scene looks properly in Camera view.

