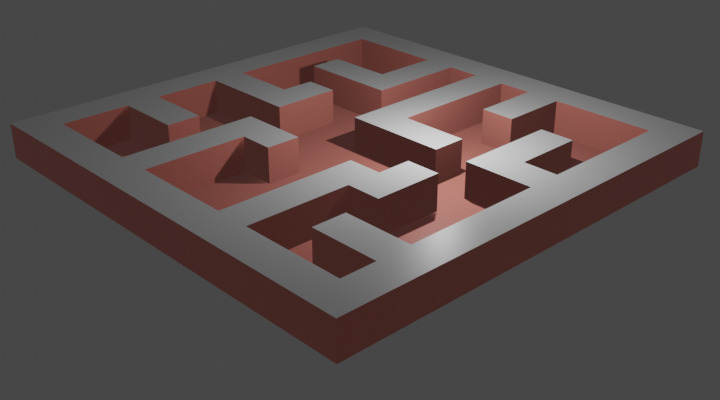
Maze
Watch the video or,
Follow the step by step instructions below.
Viewport shading
Enable the Rendered mode in Viewport Shading in the upper-right corner.

Divide
We’ll be using a plane for our maze.
Remove the cube.
Add a plane.
Scale the plane using the shortcut S and make it much bigger.
Now we need to divide the plane into smaller faces.
Go to Edit mode.
Select Edge -> Subdivide.
In the lower left corner you will see the Subdivide menu.
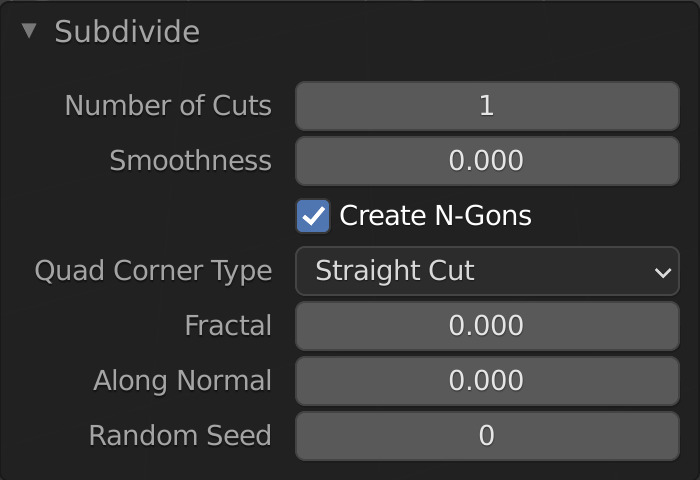
Set the number of cuts to 12.
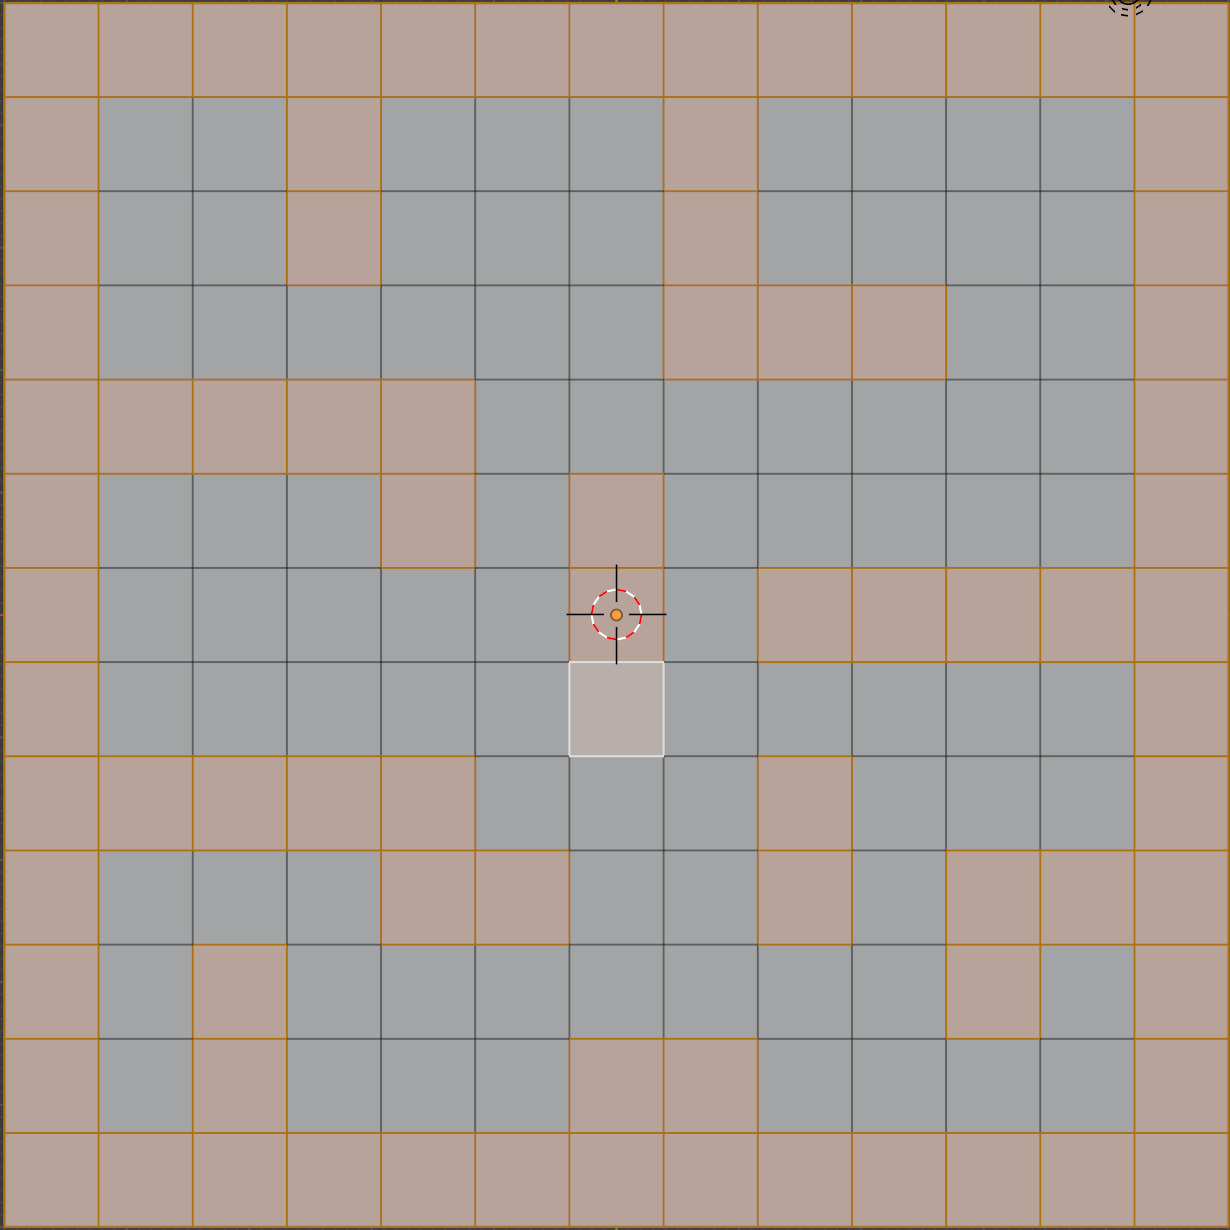
Go to Face select.

Select some faces that you want to extrude.
You can hold down CTRL to select multiple faces. Hold down SHIFT to select a single face. For example:
Once you have selected the faces you can pull them up.
Select Face -> Extrude Faces or use shortcut E and pull the faces up.
Color the maze
Go to Object mode.
Go to the Material tab.
Add a material and select a nice color for your maze.
Give some faces a different color
Go to Edit mode.
Select some faces that you want to give a different color.
Go to the Material tab.
Add a new material and select a nice color.
Assign the color to the selected faces by pressing ASSIGN.